Configure Declerative Device Management
The declarations and the status channels of declarative management can co-exist with Intune commands and profiles, which means you can gradually adopt the new features, without having to update all MDM work flows at once. For example, a server might just implement status subscriptions to effectively add a status channel to the MDM protocol without having to adopt all of declarative management.
Importantly, this integration doesn’t interfere with existing Intune behavior. Declarative management has to be explicitly enabled with a new MDM command, before you can use any of its features. Without that enablement, the MDM protocol functions exactly as before.
Enable declarative management
Intune enables declarative management by sending a DeclarativeManagementCommand to the device through the usual Intune command processing flow. This command serves two purposes:
- It enables the declarative management features.
- It signals to the device that the server has updated declarations and the device needs synchronize the declarations with the server. In this case, the command can include a payload containing synchronization tokens to allow for an efficient synchronization flow.
Once Intune has enabled declarative management, it can’t disable it. However, the server can remove all declarations from the device to effectively disable any declarative management behavior.
If you unenroll a device, the device removes all declarative management state, including all policies applied through declarations.
Note, that on macOS and Shared iPad, you must send the management commands separately on the device and user channels to turn on declarative management on each channel. Similarly, each channel reports declarative management status separately.
Microsoft Intune has also enabled Declarative Management for macOS for the following capabilities:
- Software Update
- Passcode
Apple’s declarative device management (DDM) allows you to install a specific update by an enforced deadline. The autonomous nature of DDM provides an improved user experience as the device handles the entire software update lifecycle. It prompts users that an update is available and also downloads, prepares the device for the installation, & installs the update.
Lets create a MacOS Software Update Policy that uses DDM.
Configure the managed software updates policy
Section titled “Configure the managed software updates policy”- Sign in to the Intune admin center.
- Select Devices > Manage devices > Configuration > Create.
- Enter the following properties and select Create:
- Platform: Select macOS.
- Profile: Select Settings catalog.
- In the Basics tab, enter the following information, and select Next:
- Name: Enter a descriptive name for the policy. Name your policies so you can easily identify them later.
- Description: Enter a description for the policy. This setting is optional, but recommended.
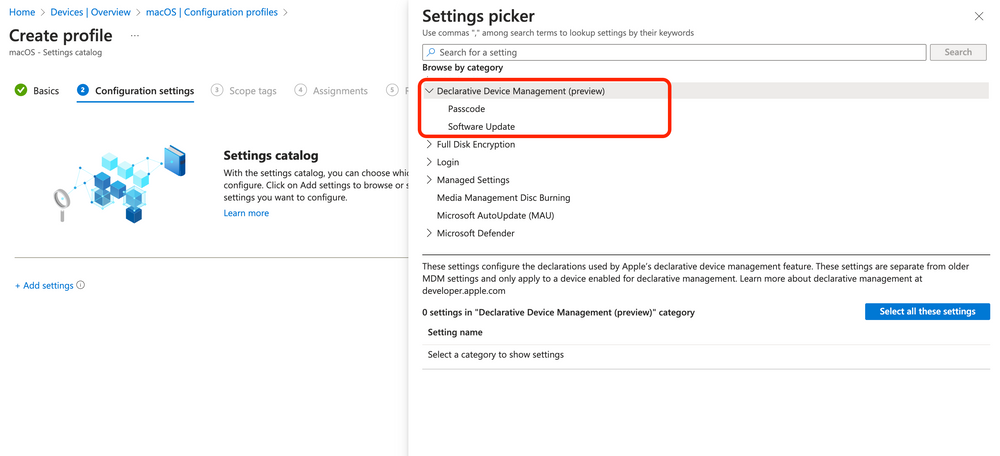
- In Configuration settings, select Add settings > expand Declarative Device Management > Software Update.
- Choose Select all these settings and then close the settings picker.
- Configure the settings:
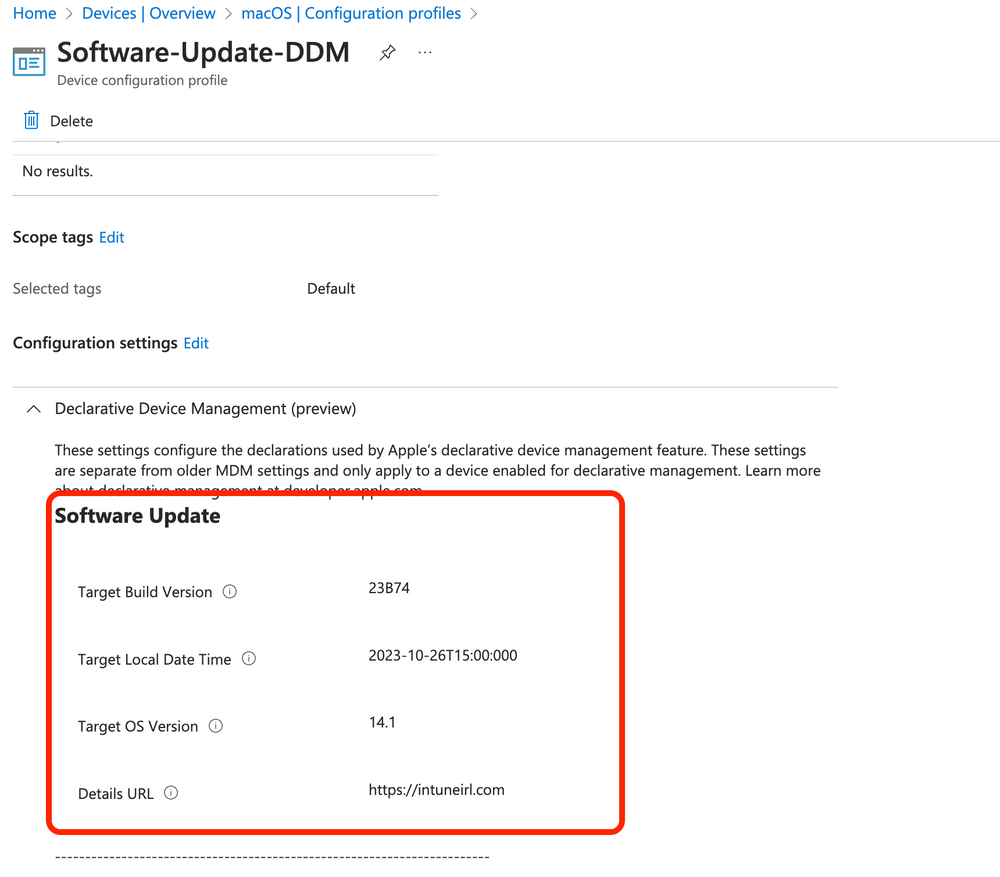
- Details URL: Enter a web page URL that has more information on the update. Typically, this URL is a web page hosted by your organization that users can select if they need organization-specific help with the update.
- Target Build Version: Enter the target build version to update the device to, like 20A242. The build version can include a supplemental version identifier, like 20A242a. If the build version you enter isn’t consistent with the Target OS Version value you enter, then the Target OS Version value takes precedence.
- Target Date Time (UTC): Select or manually enter the date and the time that specifies when to force the installation of the software update. The Target Date Time (UTC) setting schedules the update using the UTC timezone. This will take the configured time and convert it to UTC before sending the policy to be scheduled in the device’s local timezone. For example, an Admin located in Eastern US configures an update to install at 2PM. The Eastern US timezone is 5 hours behind UTC, so the time would be converted to 5 hours after 2PM (EST) which is 7PM (UTC). Then, the policy will schedule the update to happen at 7PM in the local timezone of devices that receive the policy.
- If the user doesn’t trigger the software update before this time, then a one-minute countdown prompt is shown to the user. When the countdown ends, the device force installs the update and forces a restart.
- If the device is powered off when the deadline is met, when the device powers back on, there’s a one hour grace period. When the grace period ends, the device force installs the update and forces a restart.
- Target OS Version: Select or manually enter the target OS version to update the device to. This value is the OS version number, like 16.1. You can also include a supplemental version identifier, like 16.1.1.
- Select Next.
- In the Scope tags tab (optional), assign a tag to filter the profile to specific IT groups. For more information about scope tags, go to Use role-based access control and scope tags for distributed IT.
- Select Next.
- In the Assignments tab, select the users or groups that will receive your profile. For more information on assigning profiles, go to Assign user and device profiles.
- Select Next.
- In the Review + create tab, review the settings. When you select Create, your changes are saved, and the profile is assigned. The policy is also shown in the profiles list.